This blog post explains how to install a Windows 7 VM using the existing modern.ie images provided by Microsoft free of charge. It’s possible that next year this tutorial might not work, but you can achieve similar results with the Windows 8 or Windows 10 images. This was done on an ArchLinux machine, but it should work the same for other distributions.
Setting up your environment
Install the following dependencies:
# pacman -S unzip wget libvirt ebtables dnsmasq bridge-utils qemu dmidecode virt-manager
Then, start the libvirt service:
# systemctl start libvirtd.service
You need to start it before running the virtual machine, you can also leave enabled for the next reboot with systemctl enable
Next, we’ll verify that the libvirt installation is working, run this command:
$ virsh -c qemu:///system
If this doesn’t display a new command prompt, please refer to the QEMU and libvirt wiki pages for more info, your user should have sudo rights (wheel group in my case).
Downloading the image
Next go to a folder with at least 40GB of free storage and clone this repository from lentinj.
Go to that folder and run ./ie-urls.sh to fetch the list of VMs links. Copy whatever you want and run ./fetch.sh <url> to download it and convert it to a format compatible with libvirt.
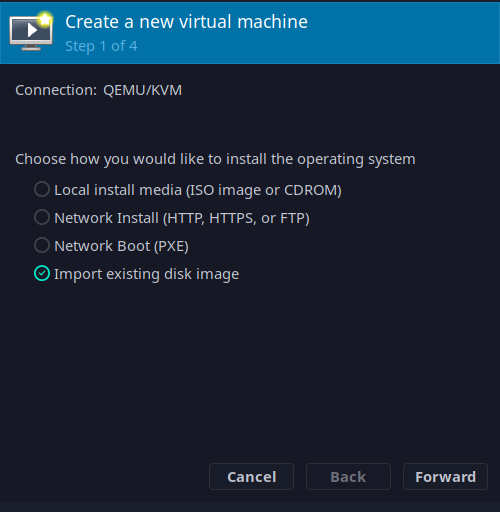
After this is done, open virt-manager and add a new virtual machine, selecting the option Import existing disk image:
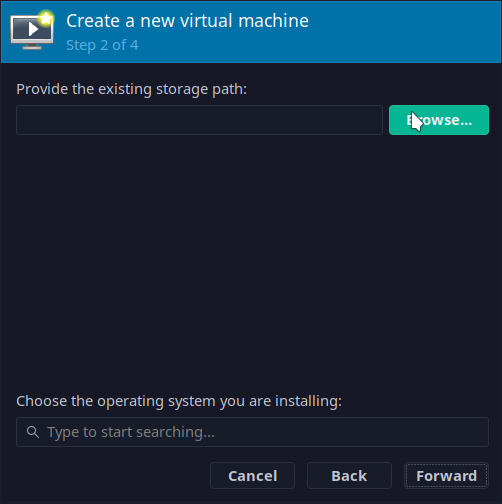
Add a new pool that is located in the ie-vm repository location:

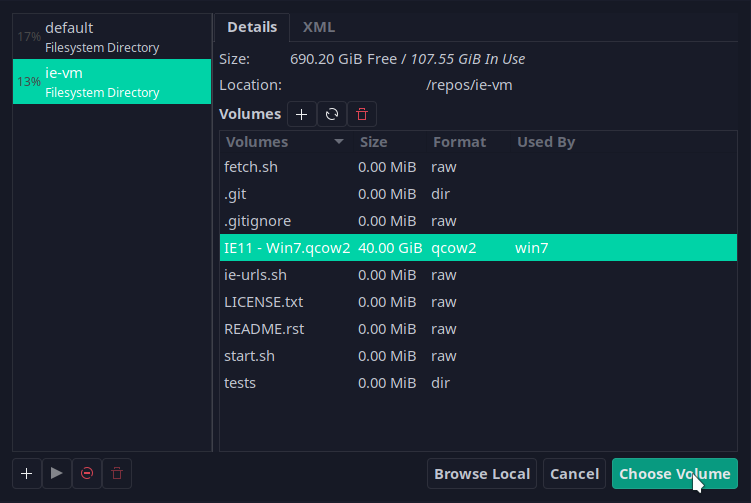
Select the qcow2 file:
Set the operating system as generic and configure the RAM and CPU to your taste.
Finish the wizard and start the VM. Before installing your applications, you need to install the Spice Guest Additions, to share keyboard and auto resize the VM screen. Download them from spice-space. Download the file in Guest > Windows binaries > spice-guest-tools and install it. Reboot the machine.
Now you can install the applications that you need and Windows updates. After your machine is configured, turn it off and create a new snapshot from the VM ui. With this VM can be restored to refresh the test license from Microsoft.
Done! You now have a new Windows VM running on libvirt.